Naming aside, I like a crumb crust because it goes together quickly and is pretty hard to mess up. Not that I haven't made some serious attempts.
The recipe calls for Graham Flour or Whole Wheat Pastry Flour. I didn't have either of those things. Instead, I used half whole wheat flour and half crushed graham crackers. Notice the egg. This is a baked crumb crust - the first one I had made.
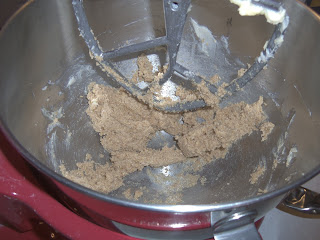
I creamed the butter, sugar, and salt together in my mixer. You can do this by hand, if you don't have a stand mixer. Use a hard spatula and be prepared for your arm to get tired. I needed one egg yolk, so I broke the egg over a small bowl and used the shell to separate the yolk from the white.
I transferred the egg back and forth between the two halves of the shell until the white all dripped off into the bowl. Then the yolk should have gone in with the crust. Unfortunately, I dropped it in the bowl. Whoops.
If you have trouble breaking an egg evenly or, like me, have no hand eye coordination, you can use a spoon the separate the egg. Be gentle, if you nick the yolk you'll have to get a new egg.
I added the yolk and mixed. Then it was time for the flour mixture. I needed to create my own graham flour, so I used my food processor.
 |
| No s'mores in your future. |
The recipe wanted "Graham Flour/Whole Wheat Pastry Flour" neither of which I had ever heard of before. I processed nine graham crackers until they were about the consistency of wheat flour. I could have put them into a sandwich bag and crushed the crackers with my hands, but this was more fun...and less likely to get graham cracker all over my kitchen.
I had whole wheat flour on hand, so I added an equal amount to the cracker crumbs.
Half of the flour mixture went into the butter and I turned on the mixer. The recipe stated that it would have a "sandy" texture but become cohesive after 1-2 minutes. It did stick together well, but it didn't look like much in the bottom of my 6 quart bowl.
Luckily, the recipe called for milk to be added with the remainder of the flour.
Unfortunately, my husband wasn't quick enough with the camera to catch the enormous puff of flour that exploded when I turned on the mixer. Remember to use your bowl guard - if you have one - or turn up the mixer speed s-l-o-w-l-y.
The crust made a nice, moderately sticky globe once all the ingredients had been added. It made enough for two crusts (if you can figure out what to do with 1/2 of an egg yolk, let me know). I separated the dough into to rough balls and wrapped each in plastic wrap.
Into the refrigerator they went to firm up for "at least two hours". I think I have established that I am both impatient and willing to disregard instructions at my peril. I took them out of the fridge after about 15 minutes.
 |
| Fifteen minutes versus two hours? Potato - Potahto. |
I was supposed to roll out the crust on a floured surface, but I worried that the crust would stick to the counter. Instead I put the dough directly into the pie plate and used my fingers to flatten and shape it.
The crust was easy to work with. Whenever I noticed a crack or thin spot, I just pushed around it and squeezed more dough into that area. That probably wouldn't have worked if I had let it chill as long as I was supposed to.
All together, including chill time, I spent about 30 minutes making this crust. And I took a couple of breaks to track down blankies and lost tennis shoes.
I wasn't quite done yet. Remember the egg? This crust has to be baked for 10 minutes at 350 degrees. The recipe said that it should be "browned and fragrant". Boy howdy, they weren't kidding. It smelled DIVINE when it came out of the oven. I considered eating it without the filling. But then, it wouldn't be pie.


No comments:
Post a Comment