Are there any two things that go together as well as peanut butter and chocolate? Maybe chocolate and marshmallows? This pie has peanut butter, chocolate, AND marshmallows. Get yourself a glass of milk and don't plan on donating blood anytime soon - your blood sugar is going to go up just looking at these photos.
This pie has three layers: the crust, the crust coating, and the filling.
I prepared the crust, Graham Cracker Whole Wheat Crumb Crust, before I made the pie filling. The filling doesn't require any baking, this is a chilled pie. The recipe calls for fat free half-and-half and heavy cream. I didn't have any heavy cream on hand, so I used heavy whipping cream. There isn't a huge difference between the two; the "heavy" in the name denotes butterfat content. Regular whipping cream (as opposed to heavy) will have a lower butterfat content and not hold its form as long. For this pie, I want the filling to stay firm with a little refrigeration, so butterfat is important. Plus, it is delicious.
I've tried a lot of different peanut butter pie recipes, but this one is by far my favorite. The people over at King Arthur Four hit the jackpot when they added marshmallow fluff to the pie. It adds sweetness, increases the thickness, and...just wow. In case you can't tell, I've made this pie before and it was enough of a success that I had to share it with you.
Please don't take worry about what I use being store-brand or the real thing. With the exception of my clear gel, which I can't seem to find at my local big box, I haven't noticed any difference in quality from brand to brand for the items I used here.
I did deviate from the King Arthur pie recipe in one key area: chocolate. KAF used plain peanut butter to coat the bottom of the crust and insulate the pie filling from any cracks in the crust. Why go plain when you have chocolate available? I melted milk chocolate chips and skim milk to make a coating for my crust.
To melt the chocolate, I used a double boiler. If you don't have one, a regular sauce pan will work, but you need to watch it like a hawk. I have burned more than one pan of chocolate by setting down my spoon and turning my back on it for just a minute. If you use a sauce pan, stir constantly and make your crust coating before you start the filling. I did this while my filling was in the mixer.
The double boiler gets 2-3 cups of water in the lower pan and 6 ounces of chocolate chips, about 1/2 of a regular size bag.
 |
| Who needs a measuring cup? |
A 1/2 cup of skim milk will help the chocolate reach a thinner consistency for pouring onto the crust and filling in all of the little cracks and crevices.
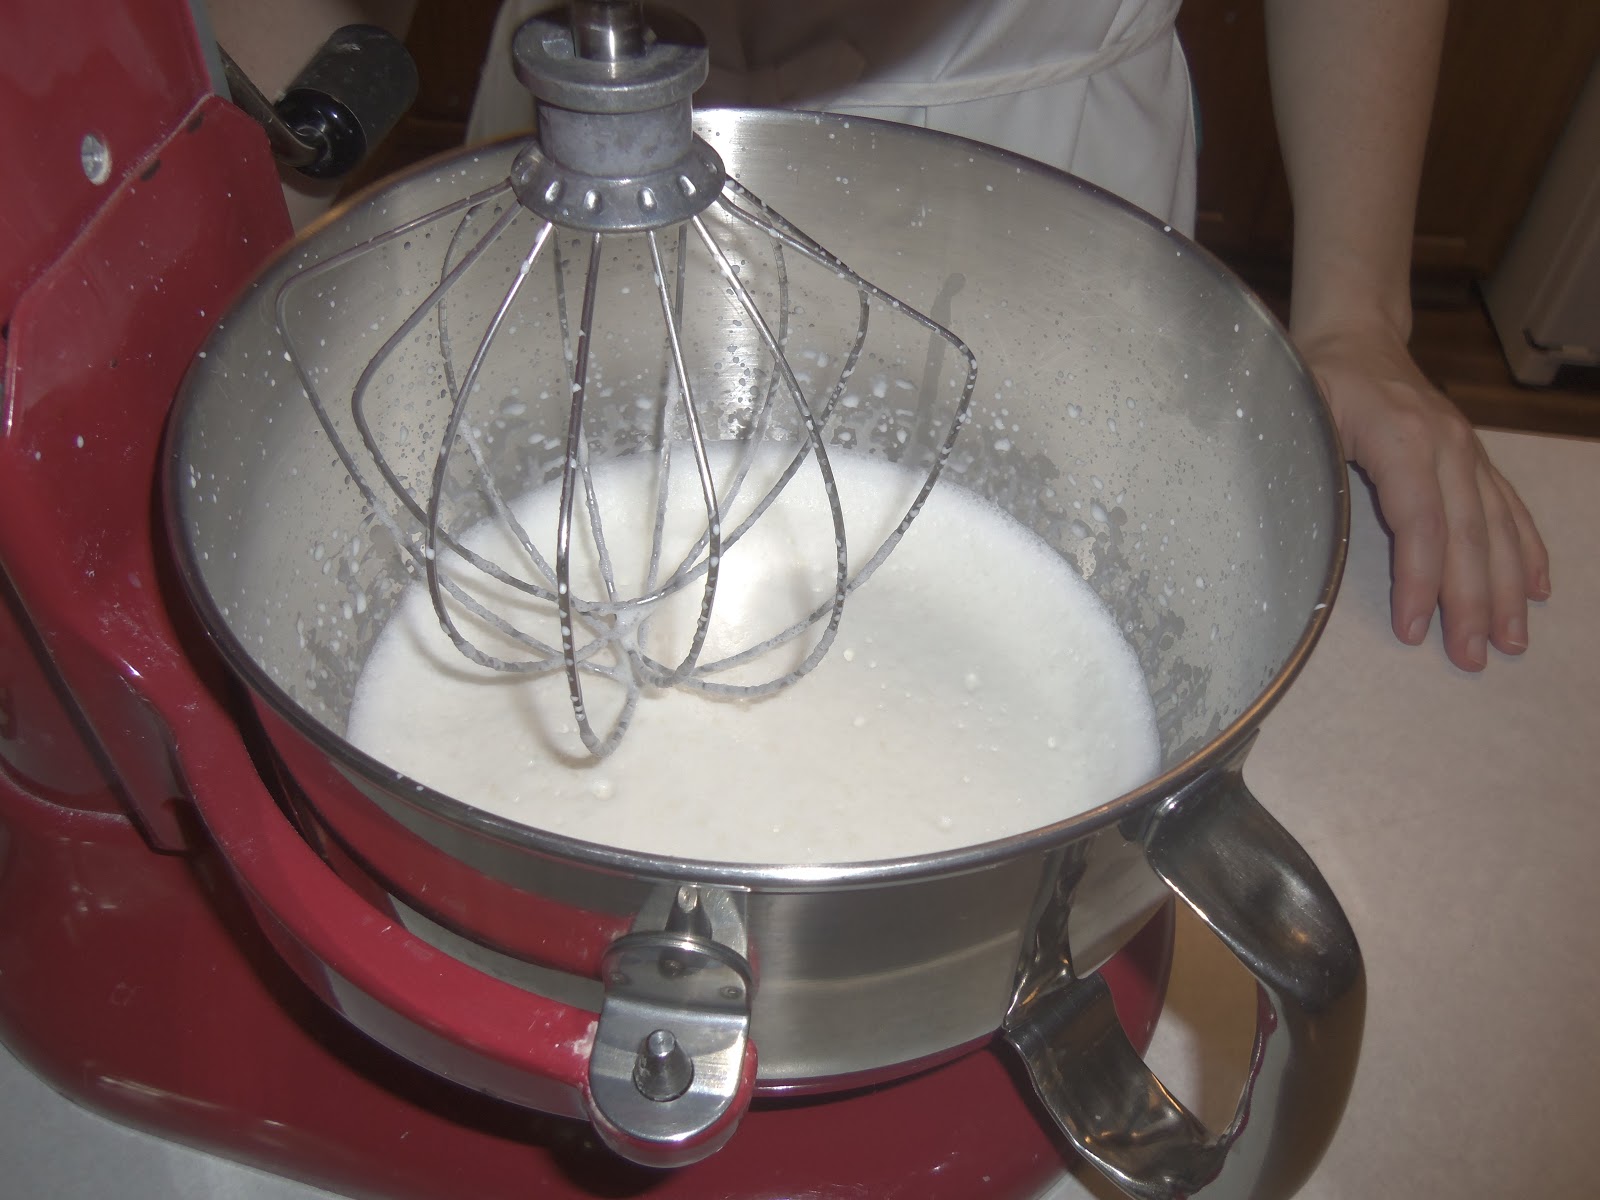
The chocolate takes a while to melt on medium high heat (I set my burner on 7). I had time to get started on my filling. The cream and half-and-half go into my mixer, set on medium (5 on my kitchen aid mixer). I used the whisk attachment to get as much air as possible into the liquid. While it whipped, I pushed the mixer to the side and got my sugar ready.
I added two tablespoons of sugar to a scant tablespoon of clear gel. "Scant" just means "barely" or "not quite". I used a fork to stir the two together.

While I waited for the whisk to "leave a trail in the cream", as the recipe said, I checked on my chocolate. After a few quick stirs it was looking pretty smooth. The small chunks show up pretty well in teh photo. It needed to heat a bit longer. I covered the chocolate with a lid to help the heat and moisture stay in the chocolate and went back to the filling.
It took about 12 minutes for the cream to reach the right consistency. You can't see the "trail" here, but you can see the flecks of cream on the bowl. They stuck pretty well to the sides, rather than dripping right back down. I took this as a sign that it had whipped enough.
Next, I added the peanut butter, sugar mixture, and marshmallow fluff. I did not measure either the peanut butter or fluff with anything other than my eyes. You can use the displacement method to measure anything on the stickier, more liquid side of solid. Fill a glass measuring cup with 1 cup of water and add peanut butter until you reach 2 cups. Pour off the water and , voila, one cup of peanut butter. Or you can mash it into a standard measuring cup and then scoop it out.
One of the nice things about this recipe is that you can make it to taste. A little more peanut butter than the recipe calls for will just make it extra peanut-y. More fluff will make it sweeter. No problem.
 |
| Grab a spoon people, peanut butter marshmallow-y goodness is here. |
While my mixer went to work again, I checked on my chocolate. A few stirs produced some bubbles, but the chocolate was completely melted.
I took it off the double boiler and set it aside to cool. You can see that the water in my lower pan was boiling rapidly. Good thing that wasn't my chocolate directly on the heat. If you have two sauce pans, one just slightly smaller than the other, you can DIY a double boiler. I recommend the investment in the real thing, but I am not patient enough to stand over my chocolate and stir. To each his own.
My mixer had been whipping the filling on a low speed. (Anything higher than 2 with big pieces and I would have ended up with peanut butter all over the kitchen. No one wants that.) The big chunks of fluff and peanut butter had been smoothed out, and so I turned up the mixer.
My chocolate wasn't nearly as cool as it should be to pour into the crust, but I think I have mentioned before that I am impatient. I poured my, still pretty warm, chocolate into the crust and then did something you should never, NEVER, do with a hot glass container.
I put it in the freezer. This is a bad idea, mostly because extreme, rapid temperature change can cause glass to crack and break. Pay attention here, because this is important:
it could ruin the pie. Also, I don't think I would like picking glass out of the freezer. My husband pointed out this little physics lesson while he was photographing this. "Pshaw," I said. "I've done this lots of times, and I've never broken a pie plate." As we went back to the kitchen, I'm pretty sure my husband muttered, "Pie killer."
 |
| I can see the sanctions now: the National Pie Council will not be pleased. And if the FDA asks, this never happened. |
In the kitchen, my mixer was still whipping away. Five to eight minutes and the filling was smooth and creamy. I
may have licked the beater after I took it out. Purely to ensure that the filling was good enough for the blog, of course.
The filling was done, so I needed the crust. Back to the freezer, and...
Ta-da! Take that physics! Pie plate intact, chocolate cooled, deliciousness soon to commence. Still, seriously, follow my un-safe example at your own risk. The chocolate looks good though, right?
The chocolate seals the crust and the filling goes right on top of it.
For once, I didn't over-fill my pie. KAF's recipe instructed me to chill for at least four hours. But...four hours is a long time...what if I want pie now?
Covered in plastic wrap, into the freeze it goes again. This pie will be ready for slicing in 20-30 minutes.
- the Headless Cook
 Jaci:
Jaci: